How to Measure Roof Size from Google Maps: A DIY Solar Guide
Field Note
When I was planning a solar setup for a home in Austin, Texas, I was convinced I could offset 100% of the energy bill. Five minutes measuring on Google Maps told a different story — HVAC vents and a neighbor's oak tree cut usable space by nearly 25%. That reality check saved me from buying an oversized system that simply wouldn't have fit on the roof.
Before you call a single solar company, do this one thing first: measure your roof on Google Maps. It takes less than 10 minutes, costs nothing, and gives you the numbers you need to have a real conversation with an installer — and to use our USA Solar Calculator accurately.
Pull Up Your Home on Google Maps
Open Google Maps and search your home address. Switch to Satellite view — the toggle is in the bottom-left corner. Zoom in until your roof takes up most of the screen and the edges are clearly visible.
.avif)
Figure: Residential roof view captured from Google Maps Satellite.
Use the Built-In Measurement Tool
Right-click directly on your roof. A dropdown appears — select Measure distance. Click along each corner of the roof section you want to measure, then close the shape by clicking back on your first point. Google Maps will calculate the area in square feet automatically.
.avif)
Right-click to select 'Measure distance' for accurate roof area calculations.
Total Area vs. Usable Area — Know the Difference
The figure Google Maps gives you is your total roof area. Your usable roof area — the number that actually matters for solar — is smaller. Subtract space for vents, chimneys, skylights, and shaded sections. A safe planning rule:
Rule of thumb: Plan to use 75–80% of your total measured area for solar panels. Got 1,000 sq ft on Google Maps? You're realistically working with 750–800 sq ft.
.avif)
Distinguishing between total roof footprint and actual solar-ready space.
Do the Panel Math
A standard 400W panel measures roughly 6.5 × 3.5 ft. With mounting gaps and airflow clearance, each panel needs approximately 20–25 sq ft of usable roof space. The math is straightforward:
Use the reference table below to get a quick estimate based on your Google Maps measurement. For a precise figure, plug your usable area into our Small House Solar Calculator.
| Roof Size (sq ft) | Estimated Panels | Potential Output (kW) |
|---|---|---|
| 400 sq ft | ~15 panels | ~6 kW |
| 600 sq ft | ~23 panels | ~9 kW |
| 800 sq ft | ~32 panels | ~12.8 kW |
| 1,000 sq ft | ~40 panels | ~16 kW |
| 1,200 sq ft | ~48 panels | ~19.2 kW |
Figures based on 400W panels with ~20–25 sq ft per panel including mounting spacing.
Is Your Roof Suitable for Solar Panels?
Size isn't the only variable. Orientation and shading are equally critical — and often overlooked.
- South-facing roofs are the gold standard in the Northern Hemisphere, capturing the most sunlight across the full day. East- and west-facing sections still produce, typically at 10–20% less output.
- Shading between 9 AM and 3 PM is the biggest silent performance killer. Even partial shade from trees or a neighboring building can dramatically cut output. If your roof is shaded during those peak hours, discuss micro-inverters or power optimizers with your installer before committing.
Measure Each Roof Section Separately
Most homes have multiple pitches. Go back to Google Maps and measure each section individually. Note the facing direction for each, and flag any that appear shaded in the satellite image. Take these numbers to your installer and you'll walk in better informed than most of their other customers.
Ready to Run the Numbers?
You have your usable roof area. Now put it to work with our professional sizing calculators.
Off-Grid Solar Sizing: A Simple Guide to Calculating Your Power Needs
Field Note
When I set up my first off-grid cabin outside Bend, Oregon, I was so focused on the panels that I completely ignored the battery bank's depth-of-discharge. After three consecutive grey days, I found myself eating cold beans by candlelight. That miserable experience taught me: size your battery for cloudy days, not perfect sunny ones.
Getting off-grid solar right comes down to one thing — knowing exactly how much power you use. Too little battery and you're in the dark. Too much panel and you've wasted thousands of dollars.
List Every Appliance and Its Wattage
Grab a notepad and write down every device you plan to run — lights, refrigerator, laptop, phone charger, water pump. Note the wattage from the label on the back or bottom of each device. Don't skip the small stuff — a few LED lights and a phone charger add up faster than most people expect.
Convert Wattage to Watt-Hours (Your Daily Load)
Multiply each appliance's wattage by the number of hours you run it per day. That gives you watt-hours (Wh). Sum everything — that total is your daily energy load, and every other calculation builds from it.
Example: 50W fridge × 8 hours = 400 Wh. 10W LED × 5 hours = 50 Wh. Total these across all appliances to get your daily load.
Size Your Battery Bank
Your battery bank needs to store at least one full day of power — ideally two to three days for cloudy stretches. The standard sizing formula:
For chemistry, lithium iron phosphate (LiFePO4) is the current gold standard — longer cycle life, deeper discharge capability, and no maintenance compared to lead-acid. See our Battery Storage Guide for a full comparison.
Why You Need an Off-Grid Solar Calculator
Manual math works as a starting point, but it's easy to make a costly error when juggling multiple appliances, variable sun hours, and battery depth-of-discharge percentages. Before you purchase any hardware, cross-check your manual figures with one — it takes five minutes and can prevent a very expensive sizing mistake.
Calculate Your Solar Array Size
Divide your daily load by your location's average peak sun hours (PSH). Phoenix averages 6+ PSH; the Pacific Northwest averages 3.5–4 PSH in winter. Then add a 20–25% efficiency buffer for real-world losses.
.avif)
Typical off-grid power flow: From sunlight capture to appliance usage.
Quick Reference: System Sizing by Daily Load
| Daily Load (Wh) | Battery Bank (Ah @ 24V) | Solar Array (Watts) |
|---|---|---|
| 500 Wh | 50–75 Ah | 150–200W |
| 1,000 Wh | 100–150 Ah | 300–400W |
| 2,000 Wh | 200–300 Ah | 600–800W |
| 3,500 Wh | 350–500 Ah | 1,000–1,400W |
| 5,000 Wh | 500–700 Ah | 1,500–2,000W |
Based on LiFePO4 batteries at 80% depth of discharge, 4 peak sun hours daily, with a 20% efficiency buffer.
Put It All Together
With your daily load, battery bank size, and array size in hand, validate the figures with a dedicated calculator, then compare hardware. Key things to verify: your charge controller is rated for your array size (MPPT is worth the premium cost), and your inverter can handle your peak load, not just the average. Get these right upfront and you won't be eating cold beans on day three of a cloudy week.
Size Your Off-Grid System in Minutes
Enter your appliances and location. Our calculator does the battery and array math for you.
Solar Panel Efficiency: How to Compute Your Real Power Output
Field Note
After installing a system in Miami, I watched my 400W panels rarely cross 320W — even on cloudless afternoons. It took time to realize that Florida's heat alone drops panel efficiency by 15–20%. Manufacturer ratings are a lab ceiling, not a field guarantee.
Most people look at a 400W panel and assume it produces 400 watts every hour the sun is out. That gap between expectation and reality is where most solar sizing mistakes happen. Understanding the actual math — and using a professional solar calculator to apply it — is how you size a system you can rely on.
Why a 400W Panel Doesn't Produce 400 Wh Every Hour
Panel wattage is measured under Standard Test Conditions (STC): 1,000 W/m² irradiance, 25°C panel temperature. That's an essentially perfect environment that rarely exists in the real world. Heat reduces output. Cloud cover reduces output. The sun's angle changes throughout the day. In real conditions, a 400W panel typically operates at 75–85% of its rated capacity. The rated wattage is a ceiling, not a guarantee.
The Core Output Formula
Every solar installer uses a version of this calculation:
Breaking down the variables:
- Panel Wattage — the rated STC output (e.g., 400W)
- Peak Sun Hours (PSH) — full-strength sunlight equivalent hours per day at your location. Phoenix averages ~5.5 PSH; Seattle averages ~3.5 PSH. This is a weighted value, not total daylight hours.
- Efficiency Factor — typically 0.75–0.85, accounting for heat loss, wiring resistance, inverter losses, and dust accumulation
Solar Panel Output Per Square Foot
Panel efficiency also determines how much roof space your system requires — critical when you've already measured your available area on Google Maps. Here's how common panel technologies compare:
.avif)
Data Visualization: Rated capacity versus real-world performance throughout the year.
| Panel Type | Efficiency (%) | Output per Sq Ft (Watts) |
|---|---|---|
| Monocrystalline (standard) | 18–22% | 17–21W |
| Polycrystalline | 15–17% | 13–16W |
| PERC Monocrystalline | 20–23% | 19–22W |
| TOPCon / HJT (premium) | 22–25% | 21–24W |
| Thin-Film (CdTe/CIGS) | 10–13% | 9–12W |
Real-world output per square foot under typical operating conditions (not STC).
Watts vs. Watt-Hours: Understanding the Difference
The conversion itself is simple:
The complication is that the "hours" in this formula means peak sun hours — a weighted measure of irradiance — not raw sunlight hours. Eight hours of weak morning light does not equal 8 PSH. Plugging raw time figures into a basic calculator produces inflated estimates. This is exactly why a proper solar calculator, seeded with NREL or NASA irradiance data for your zip code, gives you numbers you can actually make purchasing decisions from. We recommend cross-checking any manual estimate with NREL's free PVWatts Calculator, which uses decades of validated weather data.
Full Residential System Example
An average US household consumes roughly 900 kWh/month, so this 4 kW system covers a meaningful portion. Scale the numbers for your system size and location, then bring those figures to any installer for an informed conversation. For a state-specific estimate, or California Solar Calculator.
Get Your Real Output Estimate
Enter your location, panel count, and type. Our calculator applies real PSH data and efficiency losses for your zip code.
Is My Home Good for Solar? A Complete Suitability Checklist
Field Note
I once assessed a home in Georgia with a massive south-facing roof — seemingly perfect. But a large oak blocked direct sunlight from 10 AM to 2 PM. That experience taught me: home suitability isn't just about roof size; it's about the full environment surrounding the home.
Most homeowners expect a simple yes or no. The real answer depends on five or six factors — and only one of them is whether you get enough sun.
Factor 1: Roof Orientation
In the Northern Hemisphere, south-facing roofs receive the most direct sunlight across the full day — that's the gold standard. East- and west-facing sections still produce viable output, typically at 10–20% less. North-facing roof sections are the one configuration to avoid for panel placement; they're rarely worth the investment.
Factor 2: Shading Between 9 AM and 3 PM
Shading is the silent killer of solar performance. Panels generate the bulk of their daily energy during those six hours. Walk outside at midday on a clear day and observe your roof directly. If it's in partial shade from trees, a chimney, or a neighboring building during that window, your output will take a significant hit — and it often isn't obvious from satellite imagery alone.
Factor 3: Roof Age and Condition
Solar panels are warranted for 25–30 years. Your roof needs to last at least as long, or you'll pay to remove and reinstall your panels mid-system-life. If your roof is under 10 years old, you're in good shape. If it's approaching 15–20 years, get a roofer to assess it before committing to solar. Composition shingles are the easiest to work with; wood shake and slate complicate mounting significantly.
Factor 4: Usable Roof Space
A standard 400W panel needs roughly 20–25 sq ft including spacing. A 6 kW system (about 15 panels) requires around 300–375 sq ft of clear, unobstructed roof. Account for vents, skylights, and HVAC equipment that eat into that space. If you haven't already, measure your available roof area on Google Maps before going further.
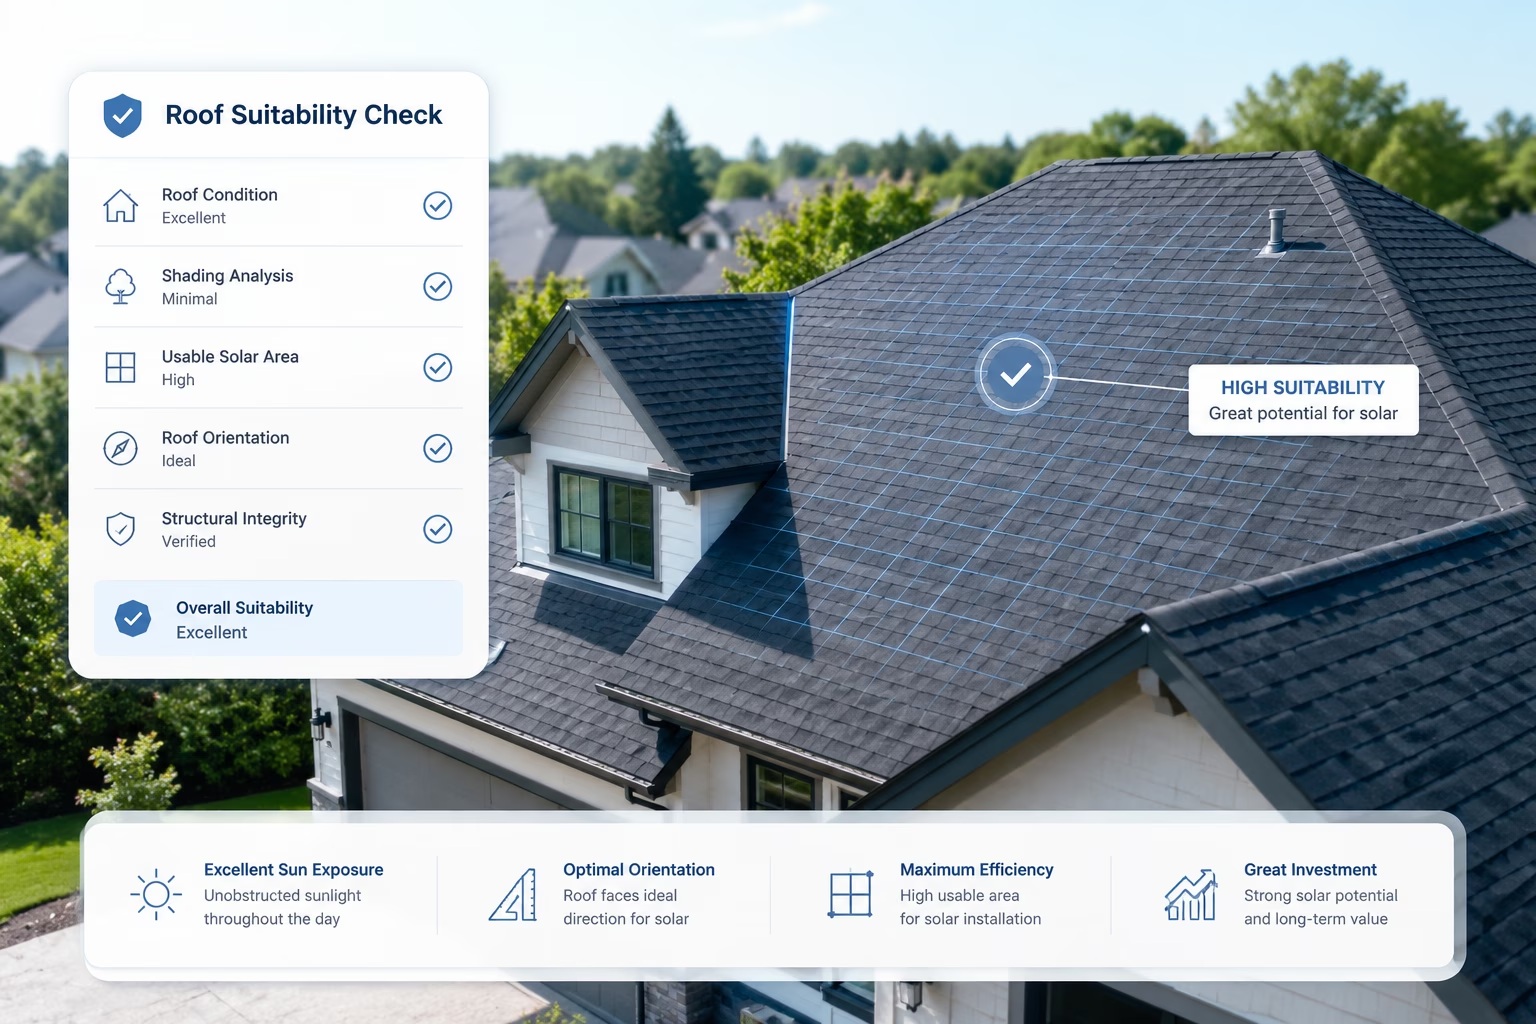
Solar Suitability Assessment: Evaluating your roof for energy efficiency.
Factor 5: Electricity Bill
Solar makes the strongest financial case when you have a meaningful bill to offset. A monthly bill of $80 or more is generally where solar starts showing a solid return on investment. If your consumption is very low, the payback period extends considerably.
Solar Feasibility Checklist
Run through this before calling anyone:
- ✔Roof orientation — Is your main roof section south-, east-, or west-facing? (South = best)
- ✔Shading (9 AM–3 PM) — Is the roof in full sun during peak hours on a clear day?
- ✔Roof age — Is it under 15 years old with at least 10–15 years of life remaining?
- ✔Roof material — Composition shingle, metal, or concrete tile? (Easiest to work with)
- ✔Usable roof area — Do you have 300+ sq ft of clear, unobstructed space?
- ✔Monthly electricity bill — Consistently $80 or higher?
- ✔HOA restrictions — Have you checked whether your homeowner's association allows solar installations?
- ✔Local incentives — Have you researched federal tax credits and state-level rebates? See Save on Solar.
Quick Suitability Reference
| Factor | Ideal Condition | What to Avoid |
|---|---|---|
| Roof Orientation | South-facing primary | North-facing only |
| Shading (9 AM–3 PM) | Full sun at peak hours | Shade from trees or chimneys |
| Roof Age | Under 15 years old | 20+ years, uninspected |
| Roof Material | Shingle, metal, tile | Wood shake or slate |
| Usable Roof Area | 300+ sq ft clear | Heavy vent/skylight obstruction |
| Monthly Electric Bill | $80+ per month | Under $50 (longer payback) |
What If Your Home Doesn't Tick Every Box?
Very few homes are perfect across every factor — and that doesn't automatically rule out solar. A west-facing roof with no shade can outperform a south-facing roof with heavy tree cover. An older roof may only need a professional assessment, not a full replacement.
If you're still unsure, the next step is a free site assessment from a local installer. They'll assess your roof in person, pull irradiance data for your location, and give you a real answer — not a guess. Use our Solar Panel Cost 2026 Guide to understand what you should expect to pay before that conversation.
Find Out if Solar Is Worth It for Your Home
Our calculators run your roof, your location, and your bill together to give you a real estimate in minutes.
Solar Panel Tilt: How to Optimize Your Angle for Maximum Output
Field Note
After monitoring a client's system at a high latitude, I found that adjusting the mount angle by just 10 degrees as we moved into winter squeezed out an extra 8% in daily energy production. "Set it and forget it" is convenient — but using a tilt calculator to understand your seasonal needs can make a real difference to your bottom line.
Most solar panels get installed at a fixed angle and never moved. That works fine. But if you want to maximize every kilowatt-hour — especially from a ground-mount with an adjustable rack — the tilt angle matters more than most people realize. Our Panel Angle Calculator handles this automatically; here's the engineering logic behind it.
The Basic Rule: Start With Your Latitude
The simplest starting point is your latitude. If you live at 35° North (roughly Los Angeles or Nashville), your panels should ideally tilt at 35° from horizontal. This angle points panels most directly at the sun's average position throughout the year — not optimal for any single day, but a solid baseline across all seasons.
Why the Optimal Angle Changes With the Seasons
The sun doesn't sit in the same position year-round. In summer it arcs high; in winter it stays low on the horizon. That movement directly affects how much light hits your panels and at what angle.
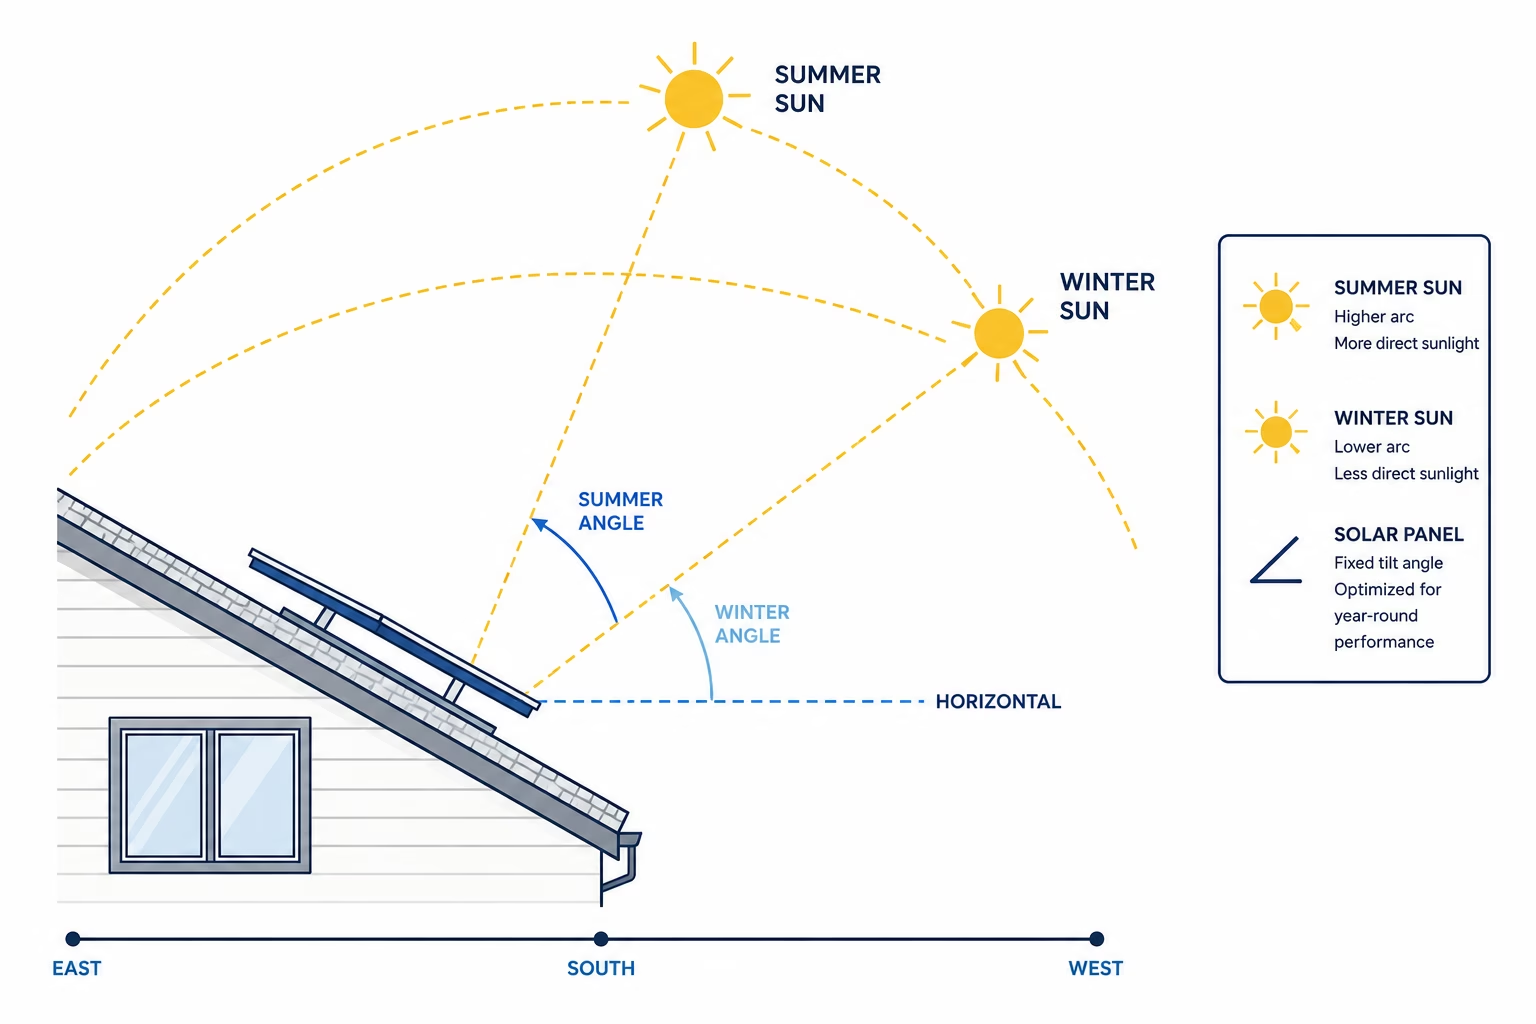
Optimizing panel tilt to capture maximum sunlight across different seasons.
- Summer: Sun is high, so a shallower tilt (latitude minus 10–15°) captures more direct midday light.
- Winter: Sun is low, so a steeper tilt (latitude plus 10–15°) is more effective.
If your system is fixed, set it at your latitude and leave it. If you have an adjustable ground-mount, even two seasonal adjustments per year can yield 5–10% more annual energy output.
Seasonal Tilt Reference
| Season | Tilt Adjustment | Goal |
|---|---|---|
| Spring / Fall | Set to your latitude (e.g., 35°) | Balanced output across the equinox |
| Summer | Latitude minus 10–15° (e.g., 20–25°) | Capture high-angle midday sun |
| Winter | Latitude plus 10–15° (e.g., 45–50°) | Maximize low-angle winter sun |
| Year-round fixed | Set to latitude angle | Best average output, no adjustments |
Why Use a Solar Panel Tilt Calculator?
Your latitude is the starting point, not the final answer. A proper tilt calculator accounts for local weather patterns, nearby obstructions, roof pitch constraints, and seasonal dust accumulation in dry climates — all of which shift the ideal angle away from the textbook answer. Tools like NREL's PVWatts and the European Commission's PVGIS database pull real irradiance data for your exact coordinates and calculate the angle that maximizes annual output for your specific system. Our Panel Angle Calculator brings this precision to your address directly.
Manual latitude math gets you 90% of the way there. A proper calculator gets you the rest — and in a 10 kW system, even a 5% gain adds up to real money over a 25-year system life.
Step-by-Step: Finding Your Optimal Tilt
Find Your Latitude
Search your city name + "latitude" in Google. You'll get a value like 33.4° or 40.7°. That number is your baseline tilt angle.
Decide Whether to Adjust Seasonally
Fixed roof mount? Set to your latitude and move on. Adjustable ground-mount? Plan for two adjustments — one in late October (steepen for winter), one in late March (shallow for summer).
Run It Through a Calculator
Plug your coordinates into our Panel Angle Calculator or NREL's PVWatts. Compare annual output at your latitude angle versus the recommended optimized angle — the difference is often small in percentage terms but meaningful in kilowatt-hours over a 25-year system life.
Account for Your Roof Pitch
If you're roof-mounting, your existing pitch largely determines your tilt. Most US residential roofs sit between 15° and 40° — close enough to the ideal range for most locations. A flat roof is the most flexible: set your racking to any angle that works for your latitude.
Find Your Optimal Panel Angle
Enter your location. Our Panel Angle Calculator outputs the year-round fixed angle and seasonal adjustments that maximize your system's output.