Solar Power for Chicken Coop Heater: What Actually Works
Table of Contents
- 1. Introduction
- 2. The Problem with Extension Cords
- 3. Can Solar Actually Heat a Coop?
- 4. Best Heater Types for Solar
- 5. Heat Lamps vs Flat Panels
- 6. The Safest Heating Option
- 7. Small vs Large Coop Needs
- 8. The Simple Setup That Worked
- 9. Choosing Right Panel Size
- 10. Battery Mistakes & Choices
- 11. How Winter Changes Solar
- 12. Solar Panel Angle Importance
- 13. Using an Angle Calculator
- 14. Battery Sizing Math
- 15. Wiring & Fusing Mistakes
- 16. Chicken Water Heaters
- 17. Low-Tech Winter Hacks
- 18. Total Setup Cost Breakdown
- 19. Things I'd Never Do Again
- 20. Equipment Graveyard
- 21. Solar in Snowy Weather
- 22. Is Solar Heating Worth It?
- 23. Beginner's Start-to-Finish Guide
It was 14°F outside, and I was trudging through six inches of snow to check on my eight Barred Rocks. Water frozen solid. Again. The extension cord I'd run from my garage had tripped the breaker overnight — leaving them in a cold, dark coop.
I remember standing there in my boots thinking, there has to be a better way to do this. That's the moment I started seriously looking into solar power for chicken coop heating. If you're building for small spaces, see our Solar Panel Calculator for Small House.
Why I Started Looking for Solar Chicken Coop Heating
My coop sits about 180 feet from the nearest outlet. That's too far for a standard extension cord without serious voltage drop. I assumed solar would be too expensive, but I was wrong. For a deep dive into costs, check Solar Panel Cost 2026.
When I started researching, I realized that off-grid solar systems are becoming much more accessible. Also, for technical standards on efficiency, you can refer to the Department of Energy (DOE) PV Basics.
The First Mistake Most Chicken Owners Make
Almost everyone starts with a heat lamp. The problem is a standard lamp runs 250 watts. That's a huge load. Running it for 12 hours burns 3,000 watt-hours. To calculate your own load, visit our Home Page.
The answer is to use a smarter heater. For mobile or RV coops, Understanding your battery bank is key; read our Battery Storage Guide to avoid burning through charge controllers like I did.
For California-based farmers, net metering might help if you connect to the grid, see Solar Calculator for California Home.
Why Extension Cords Became a Problem I Couldn't Ignore
Before I committed to solar, I tried to solve the power problem with a better extension cord setup. I ran a 10-gauge cord rated for outdoor use, 150 feet to a GFCI outlet.
It worked — sort of. But there were real issues:
- The cord would freeze into a rigid, brittle snake in deep cold, making it a tripping hazard
- One morning the GFCI tripped and I didn't notice until I found frozen water and stressed birds
- Running the cord across the yard meant I had to worry about the lawn mower, the dog, and general yard hazards all summer long
- My electricity bill crept up noticeably every winter
When I added up the cost of running a 250-watt lamp for four months of winter (roughly 90 nights at 12 hours each), I was looking at around $32–$45 added to my electric bill just for the heat lamp. That's not huge, but it's also money I'd rather spend on feed.
The extension cord also felt like a temporary fix, not a real solution. Solar felt like the actual answer. Learn about long-term costs at Solar Panel Cost 2026.
Can Solar Actually Heat a Chicken Coop?
Yes — with the right heater and the right setup.
Here's the honest answer: solar can absolutely run a chicken coop heater, but you need to be realistic about what kind of heater you use and how much battery storage you have.
Solar panels only produce power during daylight hours. In winter, depending on where you live, you might only get four to six peak sun hours per day. That means your battery bank has to carry the heater through the night, through cloudy days, and through snowstorms when your panels might produce next to nothing.
The math changes completely depending on whether you're running a 250-watt heat lamp or a 40-watt flat panel heater. Same job, dramatically different solar requirements.
Once I switched to a lower-wattage heater, solar became completely practical. I've run my current setup through two full winters in the upper Midwest and it's held up even during a stretch of five overcast days in a row.
The Heater Types That Worked Best for Me
After testing several options, here's what I actually recommend — ranked by solar-friendliness:
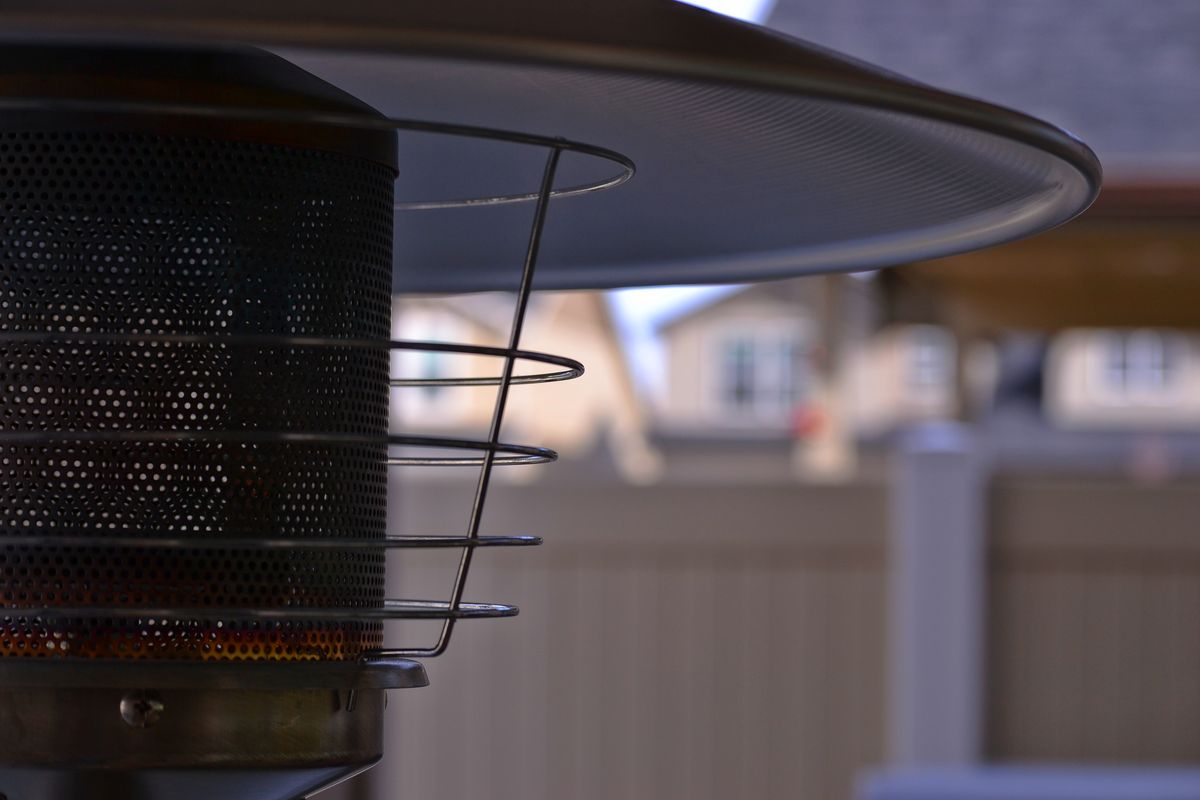
- Flat Panel Radiant Heaters (40–80 watts): These are my top pick for solar chicken coop setups. They mount on the wall, radiate heat like a gentle sun, and don't create a fire risk. Brands like Sweeter Heater and Cozy Products make models specifically for poultry.
- Oil-Filled Panel Heaters (50–100 watts): A bit more power draw but excellent at holding steady warmth. Good for larger coops.
- Ceramic Heat Emitters (60–100 watts): No light, just heat. Great for birds that don't need light disruption overnight.
- Heated Pads / Mats (20–40 watts): Perfect for keeping water thawed or giving hens a warm surface to sit on. Very low power draw.
- Heat Lamps (250 watts) — Not Recommended for Solar: Too much power demand for overnight battery storage unless you have a very large battery bank.

Heat Lamps vs Flat Panel Heaters — This Comparison Might Surprise You
I used heat lamps for three years before switching, so I know how convenient they feel. But when I sat down and compared them to flat panel heaters on a solar system, the numbers told a very different story.
| Feature | 250W Heat Lamp | 50W Flat Panel Heater |
|---|---|---|
| Overnight draw (12 hrs) | 3,000 Wh | 600 Wh |
| Battery needed (50% DOD) | ~500 Ah @ 12V | ~100 Ah @ 12V |
| Solar panels needed | 600W+ | 120W |
| Fire risk | High | Very low |
| Light disruption | Yes | No |
The flat panel heater uses 80% less power. That means you need 80% fewer batteries and 80% fewer panels to run it. The solar system becomes affordable instead of overwhelming. For accurate sizing, visit our Home Page.
The other big thing: heat lamps cause more barn fires than almost any other piece of farm equipment. Birds knock them, bedding catches, and the combination of a hot glass bulb and straw is genuinely dangerous. Flat panel heaters stay warm but not dangerously hot.
The Safest Heating Option I Tested
After testing everything I could get my hands on, my honest recommendation for the safest way to heat a chicken coop with solar power is a low-wattage, wall-mounted flat panel radiant heater.
Here's why it checks every box:
- No open flame or high-temperature surface
- No risk of bedding catching fire
- No light interference with laying cycles
- Low enough wattage to run all night on a modest battery bank
- No moving parts to break down in cold weather

The Sweeter Heater 40-watt model was the one I landed on. It draws 40 watts, mounts flush to the wall, and produces a gentle radiant warmth underneath it. My hens actually roost near it, which tells me they're comfortable.
If you're asking what is the safest way to heat a chicken coop — this is my answer. Not a heat lamp. Not a propane heater. A low-wattage wall-mounted flat panel. For general safety standards, see our Disclaimer.
Small Coop vs Large Coop — Power Needs Are Very Different
Before you size any solar system, you need to know how much insulation your coop has and how big it is. These two factors matter more than almost anything else.
For a small coop (4x6 or 4x8 feet) with decent insulation:
A 40-watt flat panel heater will likely keep temps above freezing even in moderate winters. You're looking at a small solar system — one or two panels, a modest battery bank. Check Solar Panel Calculator for Small House.
For a medium coop (6x10 to 8x12 feet):
You might need 60–80 watts of heating. Two panels and a 100Ah battery will handle this comfortably.
For a large coop (10x20 feet or bigger):
You're entering territory where solar heating gets expensive fast. Consider whether better insulation might be more cost-effective than a larger solar system.
Also worth noting: heavily insulated coops can retain a lot of body heat from the chickens themselves. Eight adult hens in a well-insulated 4x8 coop generate meaningful warmth on their own. You may not need as much supplemental heat as you think. Learn more in our Solar Guides.
The Simple Solar Setup That Finally Worked
After all my trial and error, here's the exact setup I settled on for my 6x8 coop with eight hens:
- Two 100-watt monocrystalline solar panels (wired in series for 24V input)
- A 40-amp MPPT charge controller (Renogy 40A)
- Two 100Ah AGM batteries in a 12V parallel configuration (200Ah total)
- A 40-watt Sweeter Heater flat panel
- A 100-watt heated water fount base (runs only during daylight hours when panels are producing)
- 12 AWG wiring throughout
- A 20-amp inline fuse between battery and load
Total solar input capacity: 200 watts. Daily production (winter, 4 peak sun hours): roughly 600–700 watt-hours. Daily heater consumption (40W x 16 hrs): 640 watt-hours.
It's tight. On cloudy days I'm drawing down the battery. But with 200Ah of storage and the efficiency of AGM batteries, I have enough cushion to handle two to three consecutive overcast days before I'd see the heater losing power.
Choosing the Right Solar Panel Size
Sizing panels for a chicken coop heater comes down to one simple equation:
Daily watt-hours needed ÷ peak sun hours = minimum panel wattage
For my setup: 640 Wh ÷ 4 hours = 160 watts of panels needed. I have 200 watts, which gives me a small buffer — important for winter when panel output often runs 20–30% below rated capacity due to cold, snow accumulation, and low sun angles.
A solar panel angle calculator can help you dial in the ideal tilt for your location and season. In winter, you want a steeper tilt angle — roughly your latitude plus 15 degrees. I use a free solar panel orientation calculator online to double-check my panel position each fall. For USA specifics, visit Solar Calculator USA.
Battery Problems I Didn't Expect
My first battery mistake was buying cheap flooded lead-acid batteries. They weren't rated for deep-cycle use. Real deep-cycle batteries matter. Here's what I've learned about battery options:
- Flooded Lead-Acid (FLA): Cheapest upfront. Requires regular watering. Don't work well below freezing. Only discharge to 50%.
- AGM (Absorbent Glass Mat): My current choice. Sealed, no maintenance, handles cold better than FLA. Discharge to 50%.
- Lithium (LiFePO4): Best performance, best cold-weather tolerance, longest lifespan. Expensive upfront. Can discharge to 80% safely.
I keep my AGM batteries in an insulated wooden box inside the coop. Batteries lose significant capacity below 32°F — this is something most beginner guides don't mention. For more details, see our Battery Storage Guide.
Why Winter Changes Everything for Solar
Summer solar math and winter solar math are not the same thing, and this is where a lot of beginners get surprised.
In summer at my location, I average about 5.5 peak sun hours per day. In December, that drops to about 3.5 to 4 hours. Panel output also drops when the sun angle is low, and any snow sitting on panels produces zero power.
Here's what you need to plan for in winter specifically:
- Reduce expected panel output by 20–30% from summer figures
- Plan for 2–3 days of cloudy weather with no meaningful solar input
- Increase battery capacity to handle those cloudy stretches
- Clear snow off panels whenever possible — even an inch cuts output dramatically
- Use a solar energy sizing calculator to run your winter worst-case numbers, not your average numbers
I designed my system around worst-case December production in my area. That way, even in the toughest weeks of winter, the heater keeps running. For regional calculations, see Solar Calculator USA.
The Importance of Solar Panel Angle
This was something I completely ignored in my first setup, and I paid for it with weaker-than-expected winter performance.
Flat panels on a flat surface lose a huge percentage of their potential output in winter. When the sun is low on the horizon, panels need to face it more directly. The general rule: set your panel tilt angle to your latitude plus 15 degrees in winter. For summer, subtract 15 degrees.
A solar panel tilt angle calculator gives you the exact optimal angle for your specific latitude and month. I found one at NREL's PVWatts tool online — completely free and surprisingly easy to use. You plug in your location and it shows you expected output at different tilt angles.
After I adjusted my panels from a 15° tilt to a 55° tilt for winter, my daily production went up by almost 25%. That's a meaningful difference when you're running tight on battery capacity.
Also: orient your panels true south (in the Northern Hemisphere). A solar panel orientation calculator can help you account for the difference between magnetic south and true south if you're using a compass for setup.
Using a Solar Panel Angle Calculator — It's Easier Than You Think
I know the phrase "angle calculator" sounds intimidating if you're not a solar nerd. It's not.
Here's how I do it:
- Go to NREL's PVWatts calculator (free, government resource)
- Enter your address or city
- It shows you expected solar output in kWh per month at different tilt angles
- Pick the tilt that maximizes your December and January output
- Build or adjust your panel mount to that angle
Most chicken owners set their panels up once and forget them. But taking 20 minutes in the fall to recalibrate your panel angle for winter can meaningfully increase your output during the months you need it most. Check out our Solar Maintenance Guide for more tips.
I made a simple adjustable mount from 2x4 lumber that lets me change the tilt angle seasonally. Cost me about $15 in materials and a weekend afternoon.
Solar Battery Sizing Made Simple
Here's the math that I use every time someone asks me how to size a battery for a chicken coop solar heater:
Step 1: Calculate your daily load
Heater watts x hours running = daily watt-hours
Example: 40W x 16 hours = 640 Wh
Step 2: Add cloudy day buffer
Multiply by how many days of cloudy weather you want to survive without solar input.
640 Wh x 3 days = 1,920 Wh buffer capacity needed
Step 3: Account for battery discharge limit
Divide by 0.5 for lead-acid (only use 50%), or 0.8 for lithium (use 80%)
Lead-acid: 1,920 ÷ 0.5 = 3,840 Wh capacity needed
Lithium: 1,920 ÷ 0.8 = 2,400 Wh capacity needed
Step 4: Convert to amp-hours
Divide watt-hours by system voltage (usually 12V)
Lead-acid: 3,840 ÷ 12 = 320 Ah needed
Lithium: 2,400 ÷ 12 = 200 Ah needed
This is why lithium batteries are so appealing for this use case — you need significantly fewer of them to achieve the same real-world performance. For more comparisons, read our Battery Storage Guide.
A solar battery sizing calculator can run these numbers instantly if you'd rather not do it by hand.
Wiring Mistakes That Reduced My System's Performance
My first solar system wired to the coop was a mess. I used undersized wire for the run from the panels to the charge controller, and I underestimated how much resistance in 40 feet of cable would affect my charging efficiency.
Here's what I got wrong and what I'd do differently:
Wire gauge matters more than you think.
For a 200-watt panel system running at 12V, peak current is about 16 amps. At 40 feet of cable run, that requires at least 10 AWG wire to stay within safe voltage drop limits. I initially used 14 AWG and was losing meaningful charging efficiency.

A solar wire size calculator (or solar cable size calculator) takes the guesswork out of this. You input your current, voltage, and cable run length, and it tells you the minimum wire gauge to use. I use one from the Mr. Solar website — it's free and straightforward.
Don't skip fusing.
Every circuit in your solar system needs a properly sized fuse close to the battery. A short circuit in unprotected wiring is a fire hazard. Review our Terms of Service for safety liability info.
Keep connections tight and weatherproofed.
Oxidation in connections adds resistance. I use dielectric grease on all my terminal connections and check them every fall.
My Experience With Chicken Water Heaters on Solar
Frozen water is actually a bigger immediate problem than cold temperatures for most chickens. Birds can tolerate cold reasonably well. Dehydration is more dangerous.
I run a heated water fount base — it draws 100 watts — but I only power it during daylight hours when my panels are actively producing. I set it on a simple timer to run from 8 AM to 4 PM, which covers the coldest part of the morning and ensures birds have liquid water during the day.
At night, I insulate the waterer with a small foam cooler shell I built around the fount. It's not elegant, but it keeps the water from freezing for a few hours into the cold night.
The 100-watt water heater is actually too much load to run overnight on my current battery setup along with the space heater. So I power them strategically rather than simultaneously. For larger coops.
If I were to expand my system, I'd add another 100Ah battery and run the water heater on a thermostat so it only kicks on when temps drop to 35°F. That would dramatically reduce the actual power consumption. Plan your ROI with our Monthly Savings Calculator.
Preventing Frozen Water Without Grid Power
If you're not ready to run a full solar setup yet, here are some low-tech tricks that genuinely help:
- Heated nipple systems: Small heating elements in the nipple lines draw as little as 15–25 watts. Much more efficient than a full fount heater.
- Insulated waterer housing: A simple box built around the waterer from foam board and plywood traps body heat and significantly slows freezing.
- Black rubber buckets: Rubber doesn't crack in freezing temps and black color absorbs solar heat during the day.
- Deep bowl instead of nipple systems: More thermal mass = slower freezing
- Two-bucket rotation: Bring one bucket inside to thaw while the birds use the other
These aren't replacements for solar-powered heat, but they're useful stopgaps while you're building your system or dealing with an unusually brutal cold snap. For more project ideas, visit our Home Page.
How Much This Setup Actually Cost Me
I'll give you real numbers, not estimates. My current solar chicken coop heater setup:
| Item | Cost |
|---|---|
| 2x 100W Renogy monocrystalline panels | $160 |
| Renogy 40A MPPT charge controller | $89 |
| 2x 100Ah Renogy AGM batteries | $220 |
| Sweeter Heater 40W flat panel | $65 |
| 100W heated fount base | $30 |
| 12 AWG wiring, connectors, fuse block | $45 |
| Panel mounting hardware (mostly DIY) | $25 |
| Miscellaneous (cable clips, weatherproofing) | $20 |
| Total | ~$654 |
That felt like a lot upfront. But consider what I was spending before: Extension cords ($40), Higher electricity bills ($40/season), and Replacement bulbs ($15/season). By year two, I'd effectively recouped most of the cost. Check your own ROI with our Monthly Savings Calculator.
Things I Would Never Do Again
Let me save you some pain with this list of genuine mistakes:
- Running undersized wiring: The voltage drop cost me efficiency. Use our Solar Wire Guide to avoid this.
- Buying cheap charge controllers: The $18 PWM controller died in week three.
- Leaving batteries exposed to cold: A battery in 15°F loses 30–40% capacity. Insulate your box.
- Assuming bigger heat lamp = more chickens: More wattage just means more power consumed.
- Not fusing the circuit: Every solar system needs proper overcurrent protection. See Disclaimer for safety.
- Setting panels flat: A 5° tilt in winter produced almost nothing compared to 55°.
Cheap Equipment That Failed Too Early
Here's my specific equipment graveyard — things I bought that didn't last:
- Generic PWM charge controller off Amazon ($18): Dead in 3 weeks.
- 600-watt pure sine wave inverter ($35): Died mid-February; not rated for cold.
- Cheap 12V sealed battery from hardware store ($45): Not a true deep-cycle battery.
- Bargain brand solar panels with no UL listing: Performed well below rated wattage.
Mid-range, brand-name equipment from established retailers like Renogy or Victron is worth the extra cost. For the latest pricing, see Solar Panel Cost 2026.
What Worked During Snowy Weather
Honest answer: my system runs on battery reserve during a heavy snow event, and I go out and brush snow off the panels when I can.
- Tilt angle is your friend: A 55° tilt panel sheds snow much faster.
- Black panel surface: On sunny days, panels warm up and melt accumulation faster.
- Battery reserve is everything: My 200Ah bank gives 2–3 days of buffer. See Battery Guide.
- Thermostat control: The heater only runs when temps drop below 35°F.
During a five-day stretch of heavy clouds last year, my system handled it without the heater ever losing power. For help with USA winter conditions, visit Solar Calculator USA.
Is Solar Heating Really Worth It for a Chicken Coop?
For my situation — a coop 180 feet from the nearest outlet — absolutely yes. Without hesitation.
Solar chicken coop heating makes sense if:
Your coop is far from grid power, you hate running extension cords, or you want off-grid peace of mind.
It might not be the best choice if:
Your coop is within 50 feet of a weatherproof outlet, or you live in a very mild climate. For small setups, see Solar Calculator for Small House.
What I'd Recommend to Beginners Starting From Scratch
- Insulate your coop first: Every dollar spent on insulation reduces power needs.
- Choose a flat panel heater: Mount a 40-watt unit for small coops.
- Buy mid-range components: Renogy is a solid starting point for beginners.
- Insulate your battery box: Don't skip this step.
- Set your panel angle: Adjust it seasonally.
A beginner-friendly kit runs about $500–$600 total.
The most important advice I can give you is this: don't skip the insulation step.
Before you spend a dollar on solar panels or heaters, spend an afternoon sealing gaps, adding foam board insulation to your coop walls, and making sure your door and windows are draft-free but still properly ventilated.
A well-insulated coop can cut your heating load in half. That means you need half as many panels, half as many batteries, and half as much heater wattage to maintain the same temperature. Every bit of insulation investment multiplies the value of your solar setup.
I've talked to chicken owners who spent $800 on solar equipment for a poorly insulated coop and struggled to keep temperatures reasonable, while someone with a tightly insulated coop spent $500 and ran their system with plenty of reserve.
Insulate first. Size your system realistically. Choose efficient heaters over high-wattage ones. Use proper equipment.
Do those four things and solar-powered chicken coop heating goes from a complicated idea to a system that just quietly works — all winter long, while you sleep in.
Common Questions About Solar Coop Heating
1. How many solar panels do I need for a chicken coop heater?
Typically, you need at least 200 watts of solar panels to recharge batteries enough to run a low-wattage heater overnight.
2. Can solar power run a heat lamp all night?
No, a 250W heat lamp draws too much power for standard solar setups; efficient flat panels are a much better off-grid choice.
3. What is the safest way to heat a chicken coop?
The safest method is using a low-wattage wall-mounted radiant flat panel heater because it has no open flame and stays cool to the touch.
4. Can chickens survive winter without heat?
Yes, most cold-hardy breeds survive well in insulated, draft-free coops, though supplemental heat helps during extreme sub-zero temperatures.
5. What battery size is needed for overnight heating?
A 100Ah to 200Ah deep-cycle battery bank is usually required to safely power a 40W heater through a 16-hour winter night.
6. How do I heat a chicken coop without electricity?
You can use the deep litter method, add high-quality insulation, use black rubber water buckets, and ensure the coop is properly ventilated but draft-free.
7. Are solar chicken coop heaters worth it?
Yes, they are worth it for coops far from grid power where running long extension cords is dangerous or impractical.
8. Can a 100-watt solar panel run a coop heater?
A single 100W panel is rarely enough for winter heating; 200W or more is recommended to account for shorter days and cloudy weather.